Androidアプリ入門 No.51 Intentのサンプル
Intentとは
Intentとは実行したい動作の抽象的に示す。具体的に説明すると「データを表示する」や「データを送る」といった動作とともに、送信するデータ等をセットする。抽象的に表現された動作は、具体的にActivityを指定しなくても、その動作を処理できるActivityで自動で処理される。処理できるActivityが複数存在する場合には、ユーザーがそれを選択することができる。
処理するActivityを指定しないものを「暗黙的Intent」といい、処理するIntentを明示的に指定する場合には「明示的Intent」という。
暗黙的Intentを発行すると、Activity、Service、Broadcast ReceiverのいずれかがそのIntentを受け取る。どれが受け取るかは、呼び出し方により決まる。また、呼び出す際にアクションを指定し、それを処理することができるコンポーネントで処理が行われる。
Intentのサンプル
Intentの感覚をつかむため簡単なサンプルでどのようなものかを確認する。
まず、プロジェクトを以下の条件で作成する。
| 項目 | 内容 |
|---|---|
| Project name | IntentTest |
| Build Target | Android 1.6 |
| Application name | IntentTest |
| Package name | sample.it |
| Create Activity | MainActivity |
| Min SDK Version | 4 |
ボタンを押すと、ブラウザでGoogleを開くサンプルとする。レイアウトのmain.xmlは以下のようにする。
<?xml version="1.0" encoding="utf-8"?>
<LinearLayout xmlns:android="http://schemas.android.com/apk/res/android"
    android:orientation="vertical" android:layout_width="fill_parent"
    android:layout_height="fill_parent">
    <Button
        android:id="@+id/button"
        android:layout_width="wrap_content"
        android:layout_height="wrap_content"
        android:text="googleを見る" />
</LinearLayout>
MainActivity.javaは以下のようにする。
package sample.it;

import android.app.Activity;
import android.content.Intent;
import android.net.Uri;
import android.os.Bundle;
import android.view.View;
import android.view.View.OnClickListener;
import android.widget.Button;

public class MainActivity extends Activity {
    @Override
    public void onCreate(Bundle savedInstanceState) {
        super.onCreate(savedInstanceState);
        setContentView(R.layout.main);

        Button button = (Button) findViewById(R.id.button);
        button.setOnClickListener(new OnClickListener() {
            @Override
            public void onClick(View v) {
                Intent intent = new Intent();
                intent.setAction(Intent.ACTION_VIEW);
                intent.setData(Uri.parse("http://www.google.co.jp"));
                startActivity(intent);
            }
        });
    }
}
ボタンを押されたときに、Intentのインスタンスを作成する。そのインスタンスに対しsetActionでどのような動作をするのか指定する。この場合には情報を表示するACTION_VIEWを指定した。また、表示するデータをsetDataで指定する。今回はgoogleのURIを指定している。Intentにデータを設定したところで、startActivityの引数にそのIntentを引数にして実行することで、指定のアクションが実行される。
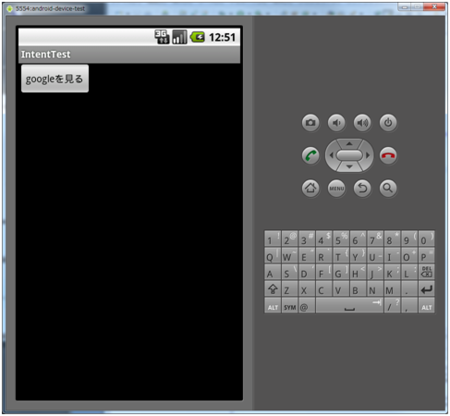
実際の実行結果は以下。「googleを見る」ボタンを押すとブラウザが開く。

ここで、ACTION_VIEWを少し掘り下げて確認する。ACTION_VIEWは、データとして指定されたURIを表示するために、最適な動作をする。つまり、http://から始まるURIであればブラウザを開き、mailto:から始まる場合にはメーラーを開くといったことを行う。
そのいろいろなものを表示するサンプルを以下に示す。まずは、main.xml。
<?xml version="1.0" encoding="utf-8"?>
<LinearLayout xmlns:android="http://schemas.android.com/apk/res/android"
    android:orientation="vertical" android:layout_width="fill_parent"
    android:layout_height="fill_parent">
    <Button
        android:id="@+id/httpButton"
        android:layout_width="wrap_content"
        android:layout_height="wrap_content"
        android:text="http://" />
    <Button
        android:id="@+id/mailtoButton"
        android:layout_width="wrap_content"
        android:layout_height="wrap_content"
        android:text="mailto:" />
    <Button
        android:id="@+id/telButton"
        android:layout_width="wrap_content"
        android:layout_height="wrap_content"
        android:text="tel:" />
    <Button
        android:id="@+id/contentButton"
        android:layout_width="wrap_content"
        android:layout_height="wrap_content"
        android:text="content:" />
</LinearLayout>
次に、MainActivity.java。
package sample.it;

import java.util.HashMap;
import java.util.Map;

import android.app.Activity;
import android.content.Intent;
import android.net.Uri;
import android.os.Bundle;
import android.view.View;
import android.view.View.OnClickListener;
import android.widget.Button;

public class MainActivity extends Activity {
    private Button httpButton;
    private Button mailtoButton;
    private Button telButton;
    private Button contentButton;

    private Map<View, Uri> actionMap;

    @Override
    public void onCreate(Bundle savedInstanceState) {
        super.onCreate(savedInstanceState);
        setContentView(R.layout.main);

        httpButton = (Button) findViewById(R.id.httpButton);
        mailtoButton = (Button) findViewById(R.id.mailtoButton);
        telButton = (Button) findViewById(R.id.telButton);
        contentButton = (Button) findViewById(R.id.contentButton);

        httpButton.setOnClickListener(ocl);
        mailtoButton.setOnClickListener(ocl);
        telButton.setOnClickListener(ocl);
        contentButton.setOnClickListener(ocl);

        actionMap = new HashMap<View, Uri>();
        actionMap.put(httpButton, Uri.parse("http://www.google.co.jp"));
        actionMap.put(mailtoButton, Uri.parse("mailto:test@example.com"));
        actionMap.put(telButton, Uri.parse("tel:117");
        actionMap.put(contentButton, Uri.parse("content://contacts/people/1"));
    }

    OnClickListener ocl = new OnClickListener() {
        @Override
        public void onClick(View v) {
            Intent intent = new Intent();
            intent.setAction(Intent.ACTION_VIEW);
            intent.setData(actionMap.get(v));
            startActivity(intent);
        }
    };
}
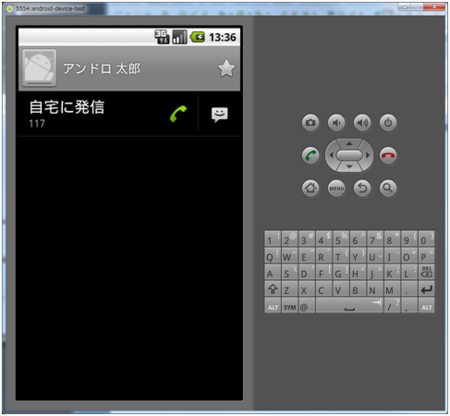
contentに関しては、事前に「連絡先」によりデータを作成しておくことで以下のように表示することができる。

基本的にIntentとデータを組み合わせることでやりたい動作を表すことができる。また、データ以外にカテゴリ、タイプ、コンポーネント、追加情報の4つの属性がある。具体的に何が指定できるかは、アクションにより変わってくる。
